NetFinder is a very powerful FTP client written by Peter Li and Vincent Tan, two well known Macintosh shareware authors. By virtue of its functionality and very Mac-like interface, it has become quite popular.
To get a copy, visit the official NetFinder web site at:
http://www.oze-mail.com.au/~pli/netfinder/
Logging On
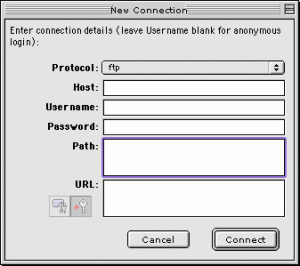
When you start up NetFinder, you will be prompted to provide the information it needs to log on to an FTP server. Although different versions may be somewhat different in appearance, this screen should look something like this:
First, make sure that the protocol dropdown menu says ‘ftp’.
Second, type in your domain name in the field labeled ‘host’. Enter the domain name of your website, or just use ‘ftp.mrhost.ca’.
Third and fourth, you should type in your username and password, respectively.
Fifth, you should type in the name of your domain again. This is actually the name of the directory in which your site is stored, and may vary depending on what you are trying to log into. If you wish to instead visit the very root of your account, you should leave this blank.
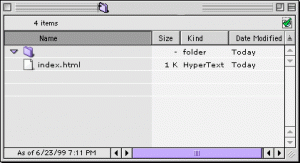
Last but not least, click on the ‘Connect’ button, which should log you on. You will receive a directory listing with the contents of your web directory.
To upload a file, open the directory you wish to upload to by double-clicking on it in the listing, then select ‘Upload’ from the Net menu. You will be prompted to select a file to upload. If you have more than one file to upload, you can upload many files and directories at once by simply dragging and dropping items from the Finder onto the directory listing (just as you would copy files from one folder to another on your Mac).
Setting Permissions
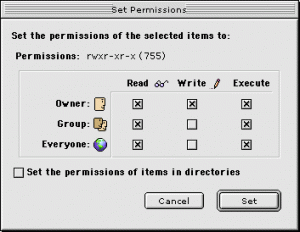
You may also find yourself needing to change permissions on various files in order to get them to work correctly. To do so, control-click on a file or directory and select ‘Set Permissions…’ from the menu that appears (or select the same function from the Net menu). A window will pop up that allows you to make alterations to the permissions of a given file or directory. Make whatever changes you wish, then hit the ‘Set’ button to make them take effect.
If you wish to alter the permissions of multiple files at the same time, all you need to do is select more than one file at a time, just as you would do using the Finder. Then, perform the function (such as setting permissions) as you would if there were only one item selected.


