It’s a pretty easy process but part of the process can be daunting to new users, especially because there’s probably going to be some warnings that pop-up that can trip you up. Here’s how to get everything set up and running perfectly, though.
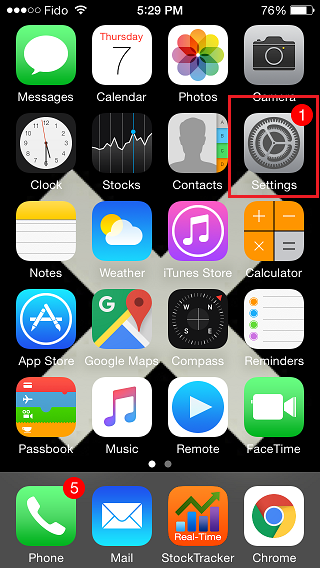
- First just click the ‘Settings’ button located on your iPhone home screen, seen below:
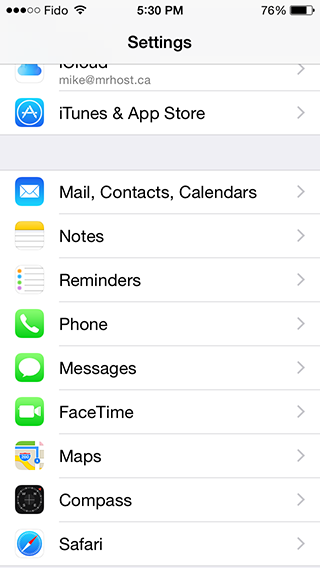
- From there you’ll see the following screen pop-up. Click the ‘Mail, Contacts, Calendars’ option as seen below:
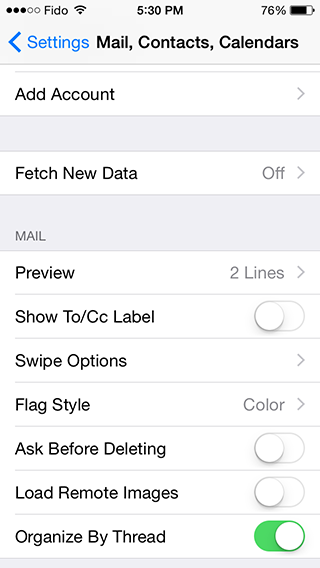
- On the next screen you’ll just need to click the ‘Add Account’ option as seen below:
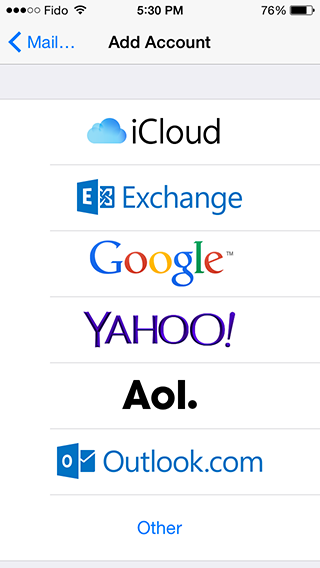
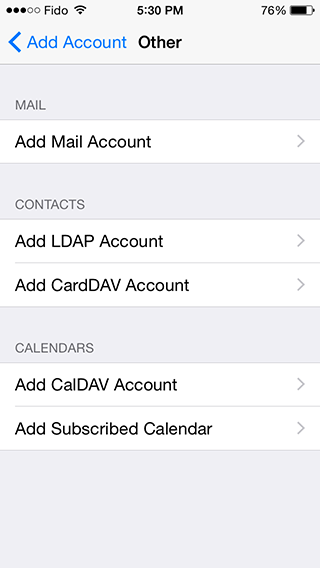
- You’ll then be taken to the screen to select the type of account you’ll be setting up. Since Mr.Host, unfortunately, is not listed there you’ll need to select ‘Other’, as seen below:
- From there, tap the Add Mail Account option as seen below:
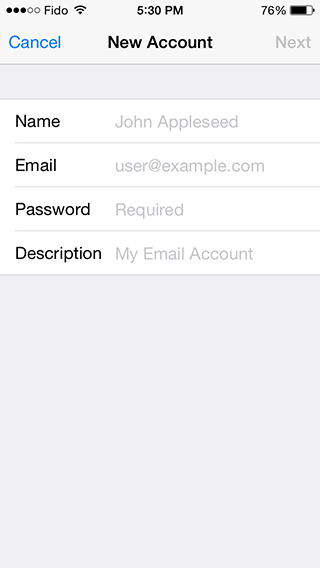
- After that, you get to the beginning of the good stuff. This is where you configure the first part of your email setup on the iPhone.
- You’ll want to enter the name as you’d like it to appear in the From: field of your email client in the Name field.
- Your email address (the one you’re setting up on the iPhone) goes into the Address field.
- The password tied to that email address goes in the Password field.
- Enter in anything you’d like to in the Description field. This will identify the email address when listed next to others when you run the Mail application. Something like Mr.Host or your domain name itself would be fine.
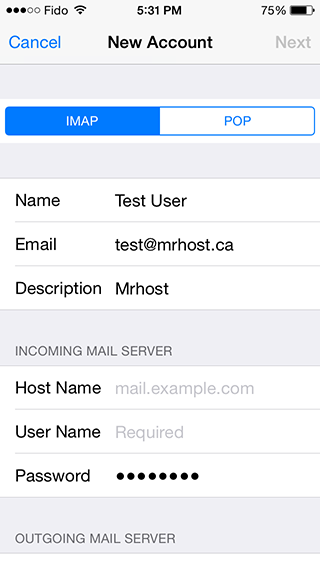
- The next step is pretty juicy. You get to enter in all of the server-related information which you should make sure you enter carefully! If you don’t, it likely won’t work as expected and you’ll get really confused and wind up having things broken
- The Host Name field under the Incoming Mail Server section is the first important thing on that page. You’ll want to enter the name of your mail server, which is going to be:mail.mrhost.ca.
- The User Name should be the full email address that you’re configuring. In this example I would enter in: test@mrhost.ca since that’s what’s listed in the Address field near the top of the screen.
- The Password field should already be filled in for you, but if it’s not just enter the password that’s tied to the email address you’re setting up.
- Scroll down a bit so that you now see the Outgoing Mail Server options.
- In the Host Name field, you’ll want to enter in the same you entered for the Host Name above. Just enter the name of your mail server, which is going to be: smtp.mrhost.ca.
- The User Name should also be the same as you entered above, which is the full email address.
- The Password should also be the same password that you entered above.
- At that point you should see the Save button in the upper right-hand portion of the screen become selectable. Tap on that.
- You should then be taken back to the Mail, Contacts, Calendar page and see your new account listed under the Accounts section
Making Sent / Drafts / Trash work correctly
If you aren’t planning on using your iPhone for e-mail much, you probably don’t need to bother with this next step– you can read your mail with no problem now. However, your iPhone will not save Drafts or Sent mail on the server, nor will it allow you delete mail (other than by manually moving the message to the Trash folder). For this, you need to configure mailbox behaviors.
In the Accounts section under Mail, Contacts, and Calendar, click on the account you just created, and scroll down to the bottom. Click Advanced.
At the top, you will see a section labeled “Mailbox Behaviors”. Select “Drafts Mailbox”. In the “On the Server” section, select your “Drafts”. Go back and set “Sent Mailbox” to “Sent” and “Deleted Mailbox” to “Trash” (again, choosing the one on the server, not the iPhone selection at the very top). You may also configure it to automatically delete messages from the Trash after a day, a week, or a month, if you so desire.
Checking your email
Now, to check your email, you should just hit the Home button on your iPhone and then tap the Mail button at the bottom of your home screen to launch the Mail application. The Mail application should then begin checking your email account automatically and you’ll soon (depending on whether you’re connected to 3G, EDGE, or Wifi) hear a notification hum and see the number of unread messages (if any) appear next to the name of the email account on the list. Tapping that account will open up a new page that displays the folders contained under that address. Tap on the Inboxto view all messages there, or tap another folder name to see those messages.
That’s it! Congrats!